Unit 3: My Community
Unit 3, Activity 5: The Funhouse
MINDS ON
Spoons as Mirrors?
Have you ever looked into a shiny metal spoon and seen your own reflection? When its curvature changes, the reflections seen on each side of a spoon become drastically different. When this happens, a spoon appears to transform into a curved mirror.
Watch the video entitled Why Am I Upside Down When I Look in a Spoon? for an explanation of this phenomenon.
 What Do You Think?
- Find a spoon and check it out for yourself. Which side gives you a clearer image?
- How do you think the size of the spoon might change the way you appear in it? Think about looking into a teaspoon versus looking into a tablespoon versus a serving spoon, and so on.
- Where else have you noticed yourself appearing differently in a reflection? Does your reflection always look the same?
The same science concepts involved in creating your reflection in a spoon are also used to create funhouse mirror images which hilariously distort the way you look. Let's look at how this is done.
ACTION
Reflections in Curved Mirrors
Curved mirrors can be used to distort the appearance of an object reflected off them. These distortions can change the appearance of an object's shape, size and orientation when they form images.
Because of this, the image characteristics differ from the characteristics of the object as it would be shown in a plane mirror. These characteristics depend on how curved the mirror is and how far away from it an object is positioned.
To classify an image, we can use the acronym LOST, meaning Location, Orientation, Size and Type.
Explore further by viewing each of the topics highlighted in green below. Click on the titles to open.
For example, as long as light rays converge and intersect at a point, a real image will be formed. However, under certain circumstances, the light rays do not do this, so virtual rays must be extended to see from where it appears the light rays are coming. If the extended virtual light rays intersect one another, a virtual image will be formed.
Remember that distortions from a curved mirror depend on how curved the mirror is and how far away the object is from the mirror.
Concave or Converging Mirrors
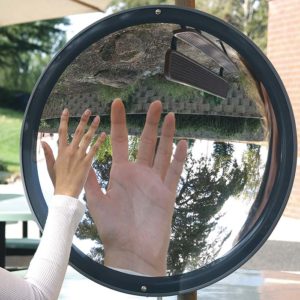
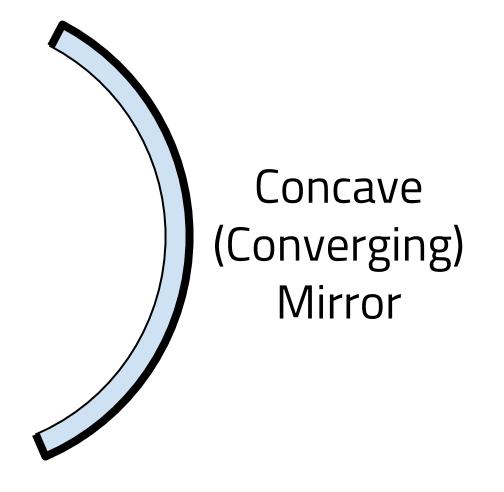
Concave or converging mirrors curve away from the object in front of them. When an object is viewed close up in a converging mirror, the image in the mirror is always upright and larger than the original object. This is useful if you want to magnify an object but keep it looking upright, like when you are applying makeup or the dental hygienist is examining your teeth.
When objects are farther away from a converging mirror, the image in the mirror appears inverted (upside down) and smaller than the original object.
Note that in the above image, you can see both conditions within the mirror. The hand is close to the mirror, so its reflected image is upright and larger. However, there is also a small, upside down image of a park bench in the mirror. This is smaller and inverted because the object, the actual park bench, is far enough away from the mirror.
The following video will help you understand the properties of a concave mirror in order to draw ray diagrams and predict where images would focus.
Now investigate for yourself how an image can be formed using a concave mirror. Use the following interactive.
ConcaveMirror
Convex or Diverging Mirrors

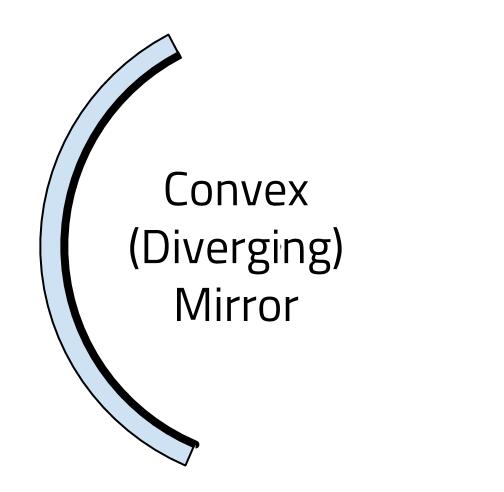
Convex or diverging mirrors curve towards the object in front of them. This type of mirror will always produce a smaller upright image in the mirror compared to the actual object, no matter how far away the object is. However, the farther away the object, the smaller its reflected image in the mirror.
Convex mirrors are used as side view mirrors on cars or mounted on the corners of buildings to help us see around corners.
The following video will help you understand the properties of a convex mirror in order to draw ray diagrams and predict where images would focus.
Now investigate for yourself how an image can be formed using a convex mirror. Use the following interactive.
ConvexMirror
Applications of Concave Mirrors in Lighting
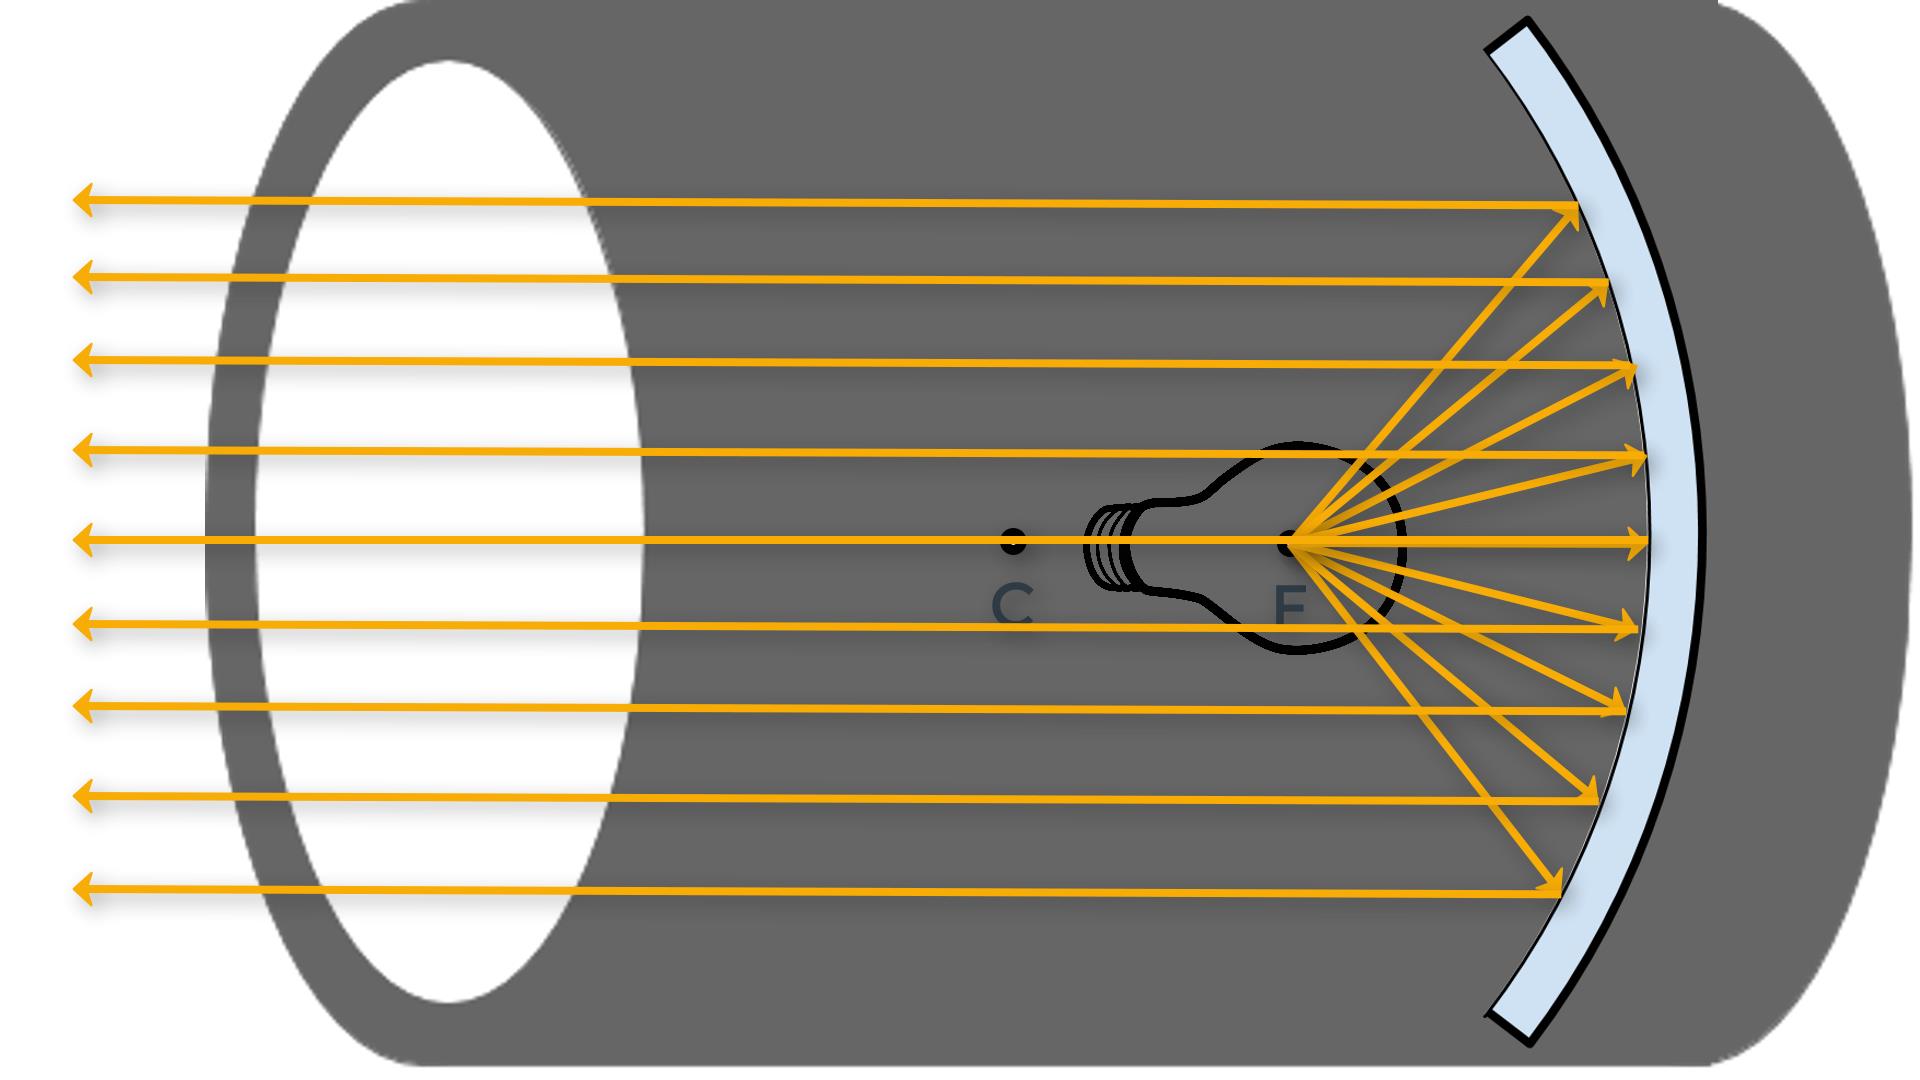
Did you know that amusement parks, theatre productions and concerts employ special lighting using concave mirrors? This lighting produces a very focused beam, but how does it get this way? The answer is that curved mirrors help direct the light to where we want it to go, in one direction.
A converging mirror can help focus a beam very precisely. To do this, simply place a bright light at the mirror's focal point. Since the light rays start at or near the focal point, they will reflect off the mirror parallel to the principal axis. This will produce a narrow beam in the same way as flashlights or headlights on a car.
What Do You Think?
- Can you think of any other uses for curved mirrors like the theatre light fixture shown above?
- Recall the subtractive colour theory. How could a light filter be used to change the colour of light beaming from one of these stage lights?
- Recall the additive colour theory. If you had multiple lights shining different colours (e.g., blue, green and red), what would it look like if they were shining on the same object?
- Do you think it would be more useful to have many colour filters with white lights or many coloured lights? What reasons do you have for making your choice?
Reviewing Images Formed in Mirrors
Look through the following images for a summary of what you have learned about concave and convex mirrors.
Concave Mirror: Object Located Beyond C

Concave Mirror: Object Located At C

Concave Mirror: Object Located Between C and F

The image is larger, inverted and on the same side of the mirror beyond C. It is a real image.
Concave Mirror: Object Located At F

Concave Mirror: Object Located Between F and Mirror

Convex Mirror: Object Located In Front of Mirror

CONSOLIDATION
 Design Your Own Funhouse Mirror
Throughout this activity, you have learned how concave and convex mirrors can create distorted images of objects in front of them. Now it is your turn to put what you have learned into practice by designing a distorted image of your own using curved mirrors.
Curved mirrors are responsible for the playful images created by funhouse mirrors in amusement parks. These mirrors are designed to make you both question what you are seeing and laugh at your own expense.
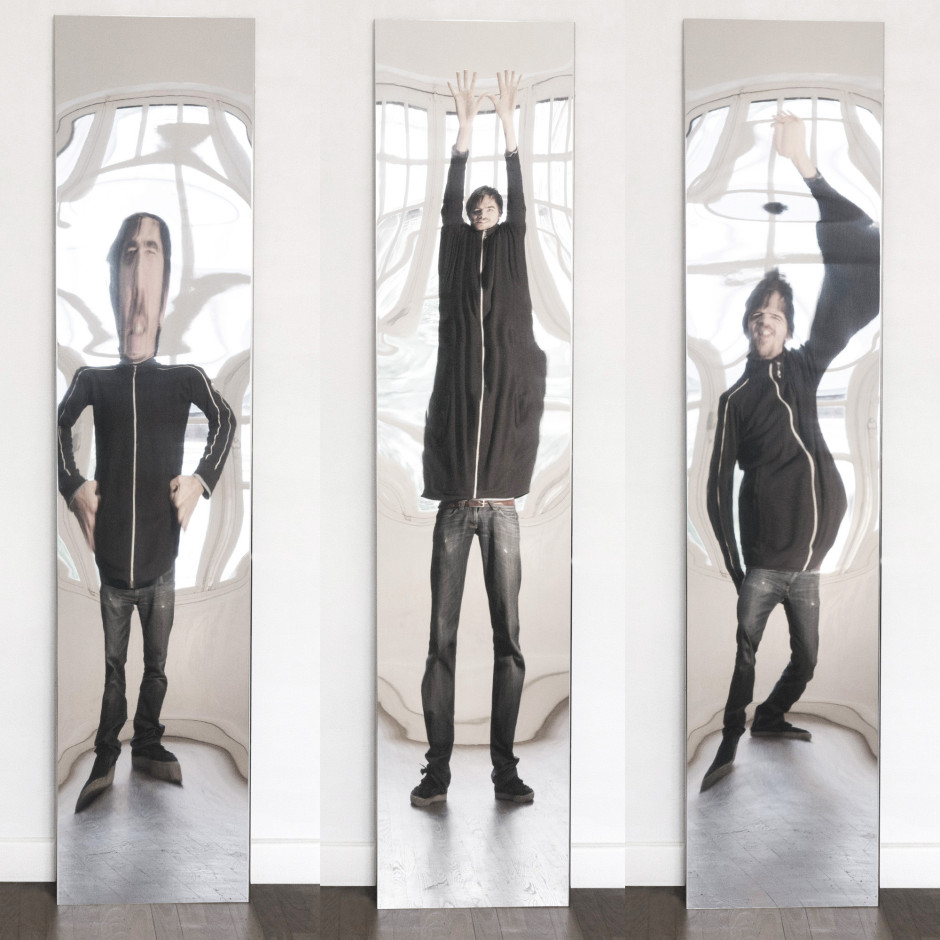
Sometimes the same mirror can have many concave and convex sections which produce both larger, magnified images and smaller, condensed images. This is the case in the mirror examples shown below.
Reflect
In order to start thinking about how these mirrors work, ask yourself the following questions:
- How many different sections of mirror do you think there are in each of the mirrors below (hint: think where the image of the person seems to change)?
- Which sections of the mirrors use concave mirrors? How do you know?
- Which sections of the mirrors use convex mirrors? How do you know?
- Which types of mirror produce larger images? smaller images? upright images?
Design
Now, design your own funhouse mirror using curved mirrors. Follow the steps outlined below.
- Provide a written description of your mirror design, as well as a side view drawing of what your mirror will look like.
- Consider where a person should be standing in front of the mirror in order to get the desired effect.
- Identify the focal length of each mirrored section. This needs to make sense when a person is standing in front of it.
- Finally, identify what the image of the person would look like in each section of the mirror. You do not have to complete any ray diagrams in this submission, but some sketches of the mirrors with rays may help with your determination of how the image might appear.
You will need to include:
- a description of your mirror, with a minimum of three different curved sections;
- a side view diagram of your mirror (hand-drawn or digital) clearly showing the different sections you have chosen;
- a description of various images you would hope to see in the mirrors;
- an explanation of where a person should stand in order to obtain the desired image in your mirror;
- the focal length of each section of your mirror;
- an explanation of what a person would see based on where they are standing and the curvatures of the different sections.
Keep in mind that the way an image is distorted in a mirror is based on how curved the mirror is (which changes its focal length) and how far away from the mirror the object is.
 Self Check
| Self Check - Design Your Own Funhouse Mirror | |
|---|---|
| I have selected a minimum of three curved sections for my funhouse mirror design, based on the images they would produce. | |
| I have provided a side view diagram of my mirror, clearly indicating the different curved mirror sections. | |
| I have identified where a person should stand in front of my mirror in order to obtain the desired image. | |
| I have clearly explained the image a person would see in the mirror if they were standing where I have identified they should. |
Use the checklist to reflect on your work.